Additional sizes may be available!
Additional sizes may be available! Email me when available
Overview
| * | Individual liquid test solutions for KH/carbonate and calcium |
| * | Essential when maintaining ideal water parameters |
| * | Use for fresh or saltwater aquariums |
Tests aquarium water for carbonate hardness (KH) or calcium. Each test kit includes reagent(s), glass test tube with cap, and easy-to-follow instructions. Number of tests varies depending on water conditions. KH/Carbonate Test Kit can be used to determine the proper dose of pH buffers. For use in fresh and saltwater aquariums. Calcium Test Kit allows you to easily and accurately measure calcium levels and maintain a healthy reef aquarium. Uses titration method, with easy-to-see color change for precise measurement. Measures calcium levels as low as 20 mg/L. For saltwater aquariums.
KH/Carbonate Test Kit
What is Carbonate Hardness?
Carbonate hardness (also known as alkalinity) is the measure of carbonate and bicarbonate ion concentrations dissolved in water. These minerals are present in municipal, well, and bottled spring water. The level of carbonate hardness in tap and bottled water depends on the source of the water and the treatment processes it has undergone. Carbonate hardness helps stabilize pH in the aquarium. An aquarium with a low kH level (50 ppm or less) will tend to be acidic. Aquariums with very low kH are subject to rapid pH shifts.
Directions for Testing Carbonate Hardness (KH):
Read thoroughly before testing. Do not allow test solution to get into aquarium.
To remove childproof safety cap: With one hand, push red tab left with thumb while unscrewing cap with free hand.
- Rinse a clean test tube with water to be tested.
- Fill the test tube with 5 ml of aquarium water (to the line on the test tube).
- Add carbonate hardness test solution, one drop at a time, holding dropper bottle upside down in a completely vertical position to ensure uniformity of drops. After first drop is added, solution will turn blue.
- Cap the test tube and invert several times after each drop. Keep count of the drops being added. Do not hold finger over open end of the tube as this may affect the test result.
- The test is completed when the water in the test tube, after having been shaken, turns from blue to yellow. If you have difficulty discerning the color after the first drop of test solution is added, remove the cap from the test tube and while holding it over a white background, look down through the tube.
- The carbonate hardness value is determined by the number of drops of the reagent that must be added to turn the water in the test tube to bright yellow.
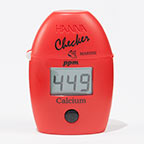
Calcium Test Kit
Calcium is one of the most important elements in a reef aquarium. Reef invertebrates such as corals, crustaceans, mollusks, and even some types of encrusting algae need calcium to grow and remain healthy. Over time, calcium levels drop as invertebrates use calcium in aquarium water.
Why Test for Calcium?
Monitoring calcium levels is essential for keeping a successful reef aquarium. Reef organisms use calcium to build a calcium carbonate skeleton. Over time, as the calcium in the water is utilized, the calcium level will gradually drop. Calcium must be present for corals to grow. Even reef invertebrates such as crustaceans, mollusks, and encrusting algae, require calcium to grow and remain healthy. The calcium level drops as it is used by invertebrates or as it reacts with excess phosphate. Elevated phosphate precipitates calcium, rendering it unavailable to reef organisms. Phosphate enters the aquarium from tap water and as a byproduct of fish and invertebrate metabolism.
Directions for Testing Calcium:
Measures calcium levels as low as 20 mg/L.
Read thoroughly before testing. Do not allow test solution to get into aquarium.
To remove childproof safety cap: With one hand, push red tab left with thumb while unscrewing cap with free hand.
- Rinse a clean test tube with water to be tested.
- Fill the test tube to the line on the test tube with the water being tested.
- Holding the bottle vertically, add 10 drops of Calcium Test Solution #1 to the test tube, cap the test tube, and shake for 10 seconds.
- Shake calcium Test Solution #2 bottle vigorously for 10 seconds,
- Holding the bottle vertically, add Calcium Test Solution #2 drop by drop to the test tube until the solution changes from pink to the blue end-point.
- Be sure to count the drops added.
- A pink color should form after the first drop.
- If a blue color forms after the first drop, the calcium concentration is 20 mg/L or below.
- As the end point is approached, the color will usually change from pink to purple before finally changing to blue.