Additional sizes may be available!
Additional sizes may be available! Email me when available
Overview
| * | Measure magnesium levels in coral reef aquariums with one hand |
| * | Enjoy professional results with this new magnesium titration test |
| * | Monitor magnesium levels fundamental to reef aquarium health |
Say goodbye to old-fashion magnesium titration test kits. Red Sea Magnesium Pro Test Kit takes a fresh new approach to titration (color change) testing for convenient and accurate test results. The innovative patent-pending titrator streamlines the titration process. Single hand operation makes magnesium titration testing hassle-free for reef care that doesn't slow you down.
Red Sea Magnesium Pro Test Kit boasts a new level of convenience for reef aquarium hobbyists. Routine and precise measurement of aquarium magnesium levels is essential for successful coral reef aquariums. This advanced magnesium titration test kit encourages proper testing skills with ease-of-use and a high degree of accuracy (±10ppm).
Included quick guide card walks you through the testing process with simple, easy-to-understand illustrations. Reverse features a chart that displays magnesium test results in ppm. Measure and monitor magnesium levels with Red Sea Magnesium Pro Test Kit to ensure ideal water parameters for coral reef aquariums housing SPS, LPS and Soft Corals. 100 Tests. Accuracy of ±10ppm.
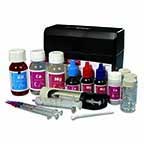
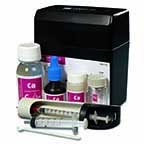
Contents:
- Titrator
- Instruction Manual
- Color Card
- Syringe 10ml
- Titrant - 75ml
- Reagent A - 25ml
- Reagent B - 25ml
Directions for Magnesium Pro Test Kit
- Using the large syringe provided, place exactly 2 ml of the water to be tested into the glass vial.
- Add 5 drops of Mg Pro Reagent A, shaking the vial for 15 seconds after each drop.
- Add 5 drops of Mg Pro Reagent B and mix the reagent gently with the water sample.
- Screw the glass vial onto the bottom of the Titrator and wait for approx 60 seconds for the test sample to obtain the titration start color as shown on the instruction card. A precipitate will form on the bottom of the vial.
- Ensure that the dispensing tip is on the 1 ml titration syringe and fill with 1ml of Magnesium Pro Titrant (C). [See note for filling titration syringe.]
- Insert the syringe into the center of the Titrator so that the volumetric scale on the side of the syringe is visible. The graduations of the volumetric scale are 0.01 ml, equivalent to 20 ppm of magnesium.
- Add the first 0.4 ml of titrant (equivalent to 800ppm of magnesium) by pressing the plunger of the syringe while gently swirling the Titrator. Continue adding the titrant gradually, swirling the Titrator after each addition and paying attention to the color in the vial. As the color in the vial approaches the end color as shown on the instruction card, add one drop at a time, swirling after each drop, until the blue end color is first achieved. Note: Shortly after the blue end color is achieved, the liquid in the vial will turn from blue to violet. Do not continue adding titrant. If you have used more than 0.8ml of titrant, you may have missed the end point and should redo the test.
- Note the amount of titrant used (according to the initial and final position of the plunger not the liquid surface) and use the table on the instruction card to calculate the level of magnesium in the water sample.
- Return any unused quantity of titrant to the Magnesium Pro Titrant C bottle.
General Information
The Foundation Elements (Ca, KH & Mg)
A successful coral reef aquarium is dependent upon maintaining the appropriate water parameters that in turn provide the stable environment required by the corals. Although all the elements found in natural seawater have an important role in providing the optimal water parameters, a few of them have a more significant role in the overall stability. These elements are the foundation of the reef environment and they include the three major elements, Calcium (Ca), Magnesium (Mg) and Bi-Carbonates (HCO3). These three elements have a major effect on the water chemistry (pH stability, Alkalinity and seawater ionic strength) and on many of the coral's biological processes (skeleton formation, ion exchange and photosynthesis).
Red Sea Reef Care Program
General Instructions for Testing and Supplementing
- Before carrying out any water testing, always check the salinity and make adjustments as necessary. If you have made adjustments to the water, wait 10 minutes for the water parameters to stabilize. (E.g. 1 ppt increase in salinity due to evaporation of freshwater will result in approximate increases of 13ppm Ca and 40ppm Mg).
- Test only with high resolution test kits such as Red Sea's Foundation Program (Calcium, Alkalinity & Magnesium) Pro Titration Kits.
- All of the Red Sea Reef Care Program supplements have dosing charts (on back of product) based on treating 100 liters / 25 gallons of water. Estimate your total volume of water (aquarium & sump less volume of live rocks etc) to calculate the correct dosage for your system.
- Supplements should be added to the sump. If you do not have a sump, add the supplements slowly to an area with high water flow to prevent direct contact with fish and corals.
- To prevent stress to the corals, the maximum daily increases of each of the elements are as follows: Calcium 20ppm; Alkalinity 0.5 meq/l (1.4 dkh); Magnesium 10ppm. Larger adjustments should be spread over a few days according to the daily maximum.
- In order to prevent the effects of unbalanced levels of the foundation elements, supplements should be added in the following order allowing 10 minutes between each:
- 1st - Magnesium
- 2nd - Alkalinity
- 3rd - Calcium
Important Notes for Using the Reef Foundation Titration Test Kits
- Before testing, clean the glass vial and the large syringe by rinsing with the water to be tested.
- After testing, rinse all syringes and vials with RO or distilled water before storing. If vials are left unwashed, a residue can form that will affect the results of future tests. Use a slightly acidic solution such as vinegar to remove the residue.
- Close all reagents tightly immediately after use.
- The test reagents are stable up to the date stated on the pack when stored closed between 15 - 25°C (59 - 77°F).
- Store the reagents in the plastic box to prevent damage from prolonged exposure to light.
Note for Filling the 1ml Titration Syringe
Raise the plunger of the syringe until the bottom ring of the plunger is at the 1.0 ml mark. The surface of the liquid will be approximately 0.1 - 0.15 ml below the plunger.
Do not try to remove the air trapped between the liquid and the plunger. This small volume of air corresponds to the liquid held inside the plastic tip.